
Pitot-static Line Installation - Doug Weiler
I am finally to one of the more enjoyable (but challenging) parts of my RV-7 project: the instrument panel. Finally it seems here things begin to come together and all of that planning and dreaming of a panel full of goodies starts to take shape. Recently I had SteinAir cut out my panel and now I was able to start to put some of the cool electronic doo-dads in place at least temporarily.
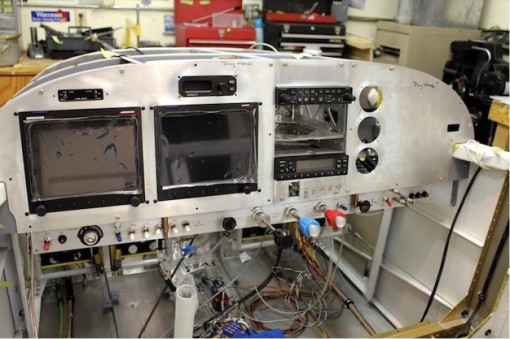 Wires everywhere!! There really is a plan!
After getting some of the preliminaries of the electrical system laid out, I thought now would be a good time to get the pitot-static lines hooked up to the various EFIS boxes and instruments. SteinAir sells those intriguing plastic air lines and fittings, which seemed like a vastly improved method of installing the pitot static system. Yes, I could be an “old school” guy like my mentor Tom Berge and install a system of aluminum tubing and AN fittings. But my skill level in cutting and bending aluminum tubing is sub-standard and the plastic air lines seemed cutting edge and MUCH quicker.
My panel requires pitot inputs to one AFS EFIS box, the Tru Trak autopilot controller, the standby airspeed, and the Tru Trak ADI-2 standby attitude indicator. I also need to provide static inputs to the all of these items plus the standby altimeter. So lots of branching of the lines was needed.
I sat down and selected all the air fittings that would work including:
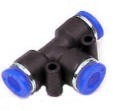
Several "T" fittings
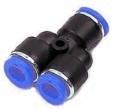
a "Y" fitting
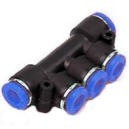
a three-port manifold fitting,

and several straight connectors that comprise a ¼” NPT fitting that screws into the back of the instruments.
I installed the straight connectors first and everything went well. Tom Berge warned to be sure to wrap additional Teflon tape around the threads to provide additional sealing capability. Screwing these fittings to the brass receptacles of the AFS EFIS box and the UMA standby instruments was no problem.
But the both the Tru Trak autopilot controller and the ADI-2 have plastic fitting receptacles which just didn’t seem to tighten up very well. And just to prove how incompetent I am, I twisted the pitot fitting into the ADI-2 just a little too far and it CRACKED!!! UGH!! How could I be so dumb??? I quickly took it out of the panel, boxed it all up and sent it off to Tru Trak to get it fixed.
With that screw-up behind me, I throttled-back and looked at this differently and decided to approach the pitot-static installation in a more logical manner. Tom B and I had heard of several RVs nearly ready to fly with big-time pitot static leaks. Once the airplane is all together it is REAL hard to find out where the leak is. THUS… I decided I was going to check the system as I assembled it. I highly suggest checking all of the integrity of the system right at the panel while everything is wide open.
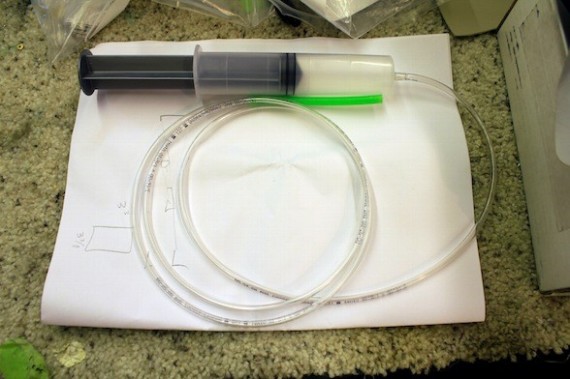
So first you need a source of pressure and suction. Nothing works better than a BIG syringe hooked up to plastic tubing. Mine was a
leftover from a TCP fuel additive kit that I bought long ago and worked perfect. You also might find a syringe like this at Fleet Farm (used for horses).
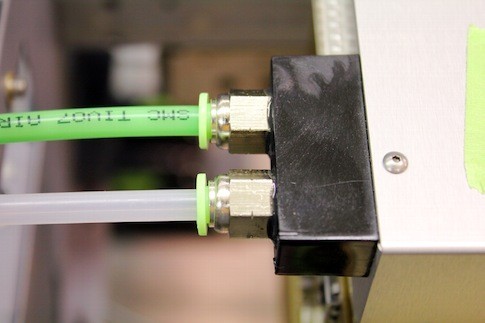 The P501 connectors installed into the Tru Trak autopilot controller with Tite Seal. Note: these connectors are shown too deep. They may crack the plastic block!!
So basically I just checked the fittings into each of the instruments once by one and then the integrity of the system as I added various lines
and connectors. One BIG tip that Stein helped be with was how to install the P-501 into the plastic receptacle blocks on the Tru Trak instruments: wrap a couple layers of Teflon tape around the
fitting and then a thin “smear” of Tite Seal. Tighten the fitting into the block first by hand and then only ONE MORE turn AND NO MORE!!!! There should be a
nice shoulder of Tite Seal around the fitting flange. That’s it…. Don’t turn the fitting any more or you may hear the discouraging “crack’ of the plastic. Ask me how I bought THREE of those
blocks!!!
After getting everything all hooked up (still not the permanent installation), I did a static leak test and everything was rock solid:
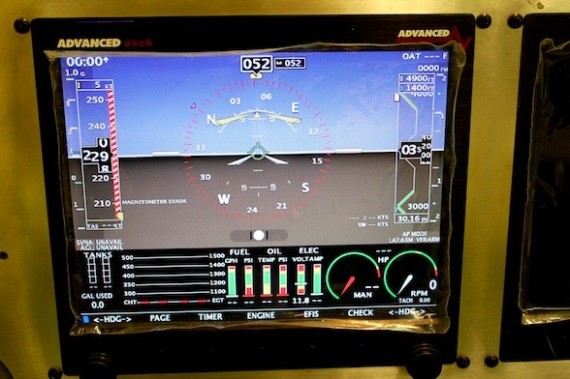
Now you have determined the integrity of the pitot static system behind the instrument panel. Now when you do the final assembly of your airplane you can hook up the wing pitot line and the fuselage static lines with confidence that any leaks that then show up will be outside of the panel.